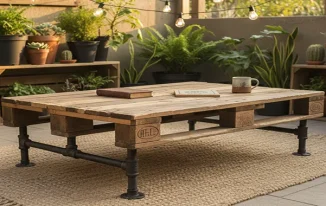
Building a dining table is a lot easier than it looks. With the right tools and materials, you can create your own beautiful, sturdy wood table to last for generations.
How to build a traditional dining table
To build a traditional dining table, you’ll need:
- A circular saw for cutting leg parts. This can be rented from a hardware store or home improvement center.
- A miter saw for cutting the tabletop and dowels. This also can be rented from a hardware store or home improvement center.
- Drills (and bits) for drilling holes in wood pieces so that screws can be driven into them when attaching them together; one drill bit should work for all of these holes unless otherwise specified below.*
A table saw is used to cut dowels into two different sizes: 1-1/2″ long pieces equal to half the length of each leg plus 1/4″ extra; and 2″ long pieces equal to twice as long as each leg plus 3/8″. You may want another person helping out with this step so they’re able to hold onto both ends while you make cuts along their lengths–you’ll only need one blade attachment on this tool but multiple blades may come in handy depending on how many other projects are being worked on at once!
Materials
You will need the following materials for this project:
- 2x8s for the legs
- 2x4s for the aprons
- 1x8s for seat and tabletop supports (can be plywood or solid wood)
- 1x12s for table top
Tools
- Drill
- Screwdriver
- Measuring tape
- Hammer
- Table saw (optional)
- Rulers, pencils and/or chalk line to mark the table top after it’s cut with a chop saw or circular saw. You can also use a framing square for this step if you don’t have access to these other tools.
- Clamps: These will be used throughout the build process so it’s best to have at least four available for each project–more if you plan on making multiple projects at once!
Instructions
- Cut the legs to size, then sand them down until they are smooth and even in shape.
- Attach the legs to the table top by drilling holes through each leg and into corresponding holes on opposite corners of your tabletop (make sure these holes line up). Then use wood screws or nails to secure all four legs firmly in place.
- Attach one end of an L-shaped brace on each side of your baseboard so it extends 2 inches past each edge, then secure with screws or nails when done installing all four braces this way around your baseboard (you may need help from someone else).
It’s easier to build a table than you might think.
If you’re planning to build a table, it’s important to have a plan. Before you start cutting wood and measuring things out, make sure that the design of your table will work in the space where it will be placed.
If this is going to be your first time making furniture from scratch, it might seem like there’s no way around having some trial and error along the way–and there isn’t! You’ll make mistakes and learn from them. Even if they’re not major ones though (like accidentally cutting off all four legs instead of just two), don’t worry too much about them; just keep going until something looks right! But if something doesn’t look right at all–if nothing seems right at all–then maybe stop for now and ask someone who knows more than me about woodworking: my dad was an amateur carpenter so I have no idea what I’m talking about here…
The good news is that it’s not hard to build a traditional dining table. Once you have all the materials and tools, it should only take a couple of hours to finish this project. You can even customize the table by choosing different types of wood or adding decorative hardware on top.