Understanding your home’s electricity consumption is the first critical step toward lowering your utility bills and reducing your carbon footprint. A smart home energy monitoring system provides this real-time visibility, allowing you to pinpoint energy vampires and shift usage patterns.While installation involves working inside your main electrical panel—a task that requires utmost caution—many popular systems are designed for the savvy DIY homeowner.
⚠️ Safety First: A Crucial Warning
Before beginning any installation, you must turn off the main breaker at your electrical panel. This de-energizes the majority of the circuits in your home. Crucially, the main service wires (the thick black cables entering the panel) remain live even when the main breaker is off. Because of the inherent risk of severe electrical shock, if you are not comfortable or experienced working near live service mains, you should hire a licensed electrician to complete the installation.
Step 1: Choosing Your Monitoring System
Smart home energy monitors typically fall into two categories:
- Whole-Home Monitors (e.g., Sense, Emporia Vue): These systems use Current Transformer (CT) clamps that attach to the main service lines coming into your electrical panel, measuring all electricity flowing into the house. They offer whole-house tracking and often use machine learning to identify individual appliances.
- Circuit-Level Monitors: These systems use smaller CT clamps on individual circuit breakers to give granular, device-by-device data. They provide maximum detail but require more clamps and labor.
Select a system that integrates well with your existing Wi-Fi network and smart home platform (like Home Assistant or Alexa).
Step 2: Preparing for Installation
Gather the following tools: a non-contact voltage tester, a 4-in-1 screwdriver, wire cutters, and the monitor kit itself.
- Turn Off Power: Flip the main breaker to the “Off” position.
- Verify Safety: Use your non-contact voltage tester to confirm that the circuit breakers are de-energized.
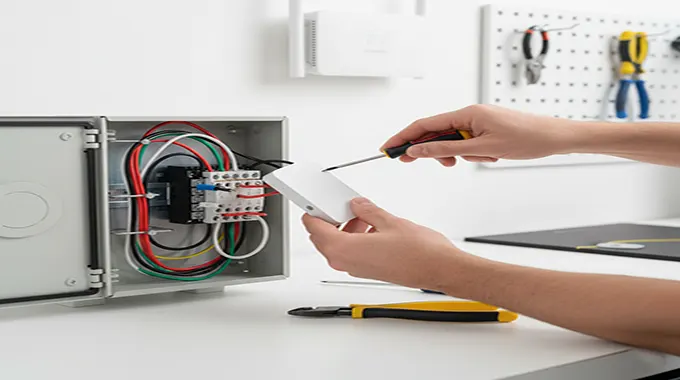
- Remove Panel Cover: Carefully unscrew and remove the panel’s dead front (the cover with the breaker holes) to expose the wiring.
Step 3: Installing the Monitor Hardware
The specific steps will vary by brand, but the general procedure is as follows:
- Mount the Monitor: Find an open spot inside or near the electrical panel (following manufacturer guidelines) to mount the central monitor unit.Some systems require mounting brackets.
- Connect CT Clamps: Locate the main service wires running through the center of your panel. Carefully clamp the two main CT sensors around these wires, ensuring the sensor labels or arrows are facing the direction of the power flow (typically toward the main breaker).
- Connect Power: The monitor needs power. Connect the system’s power cable (typically a red wire, a black wire, and a white neutral wire) to an available 240V breaker (for the red/black wires) and the neutral bus bar (for the white wire). Use the smallest 240V breaker available (often 15A or 20A).
Step 4: Connecting and Testing
- Close the Panel: Ensure all wires are neatly tucked away and replace the dead front cover.
- Restore Power: Flip the main breaker back to the “On” position.
- App Setup: Download the manufacturer’s mobile app (e.g., Sense, Emporia). The app will guide you through connecting the monitoring unit to your home’s Wi-Fi network and calibrating the sensors.
Within minutes, your new system will begin collecting data, providing you with real-time feedback on your home’s energy consumption. You are now equipped to start making informed decisions to save energy and money.